How to use a Tape Measure? Step by Step Guide
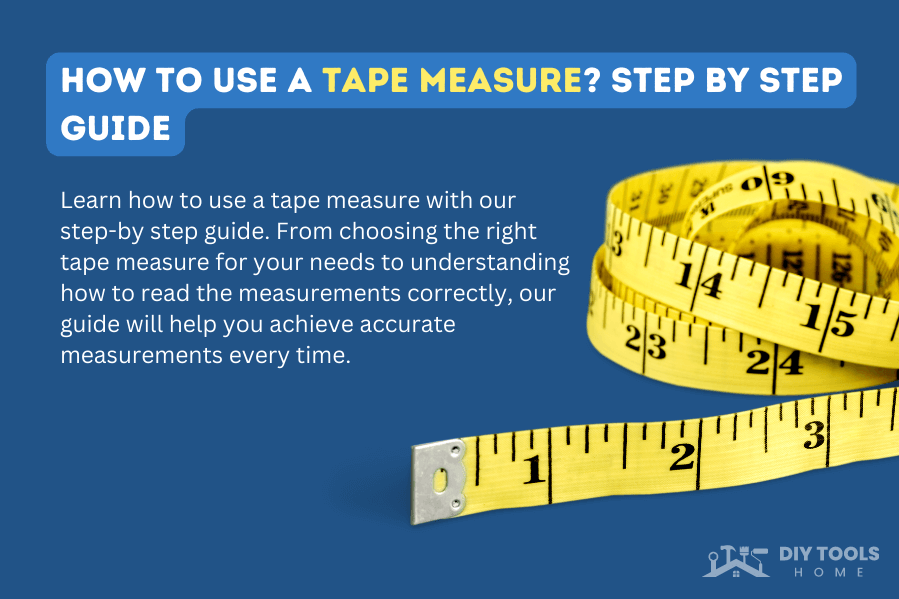
Probably you’ve heard the phrase “measure twice, cut once.” That’s excellent advice, but you must be familiar with proper tape measure usage to follow it. A measuring tape is a tool commonly used to estimate size or distance. It resembles a more extended, flexible ruler and has a case, a thumb lock, a blade or tape, a hook, and often a belt clip. It is the only tool that is present in every homeowner’s toolbox. But the question is, are you entirely using them possible?
We use them to hang paintings and determine the carpeting required for a particular room. It might seem basic; your tape measure has many hidden features. Let’s walk through this article to learn some essentials for using and reading a tape measure correctly and some advice we bet you needed to understand.
Table of Contents
Parts of a Tape Measure
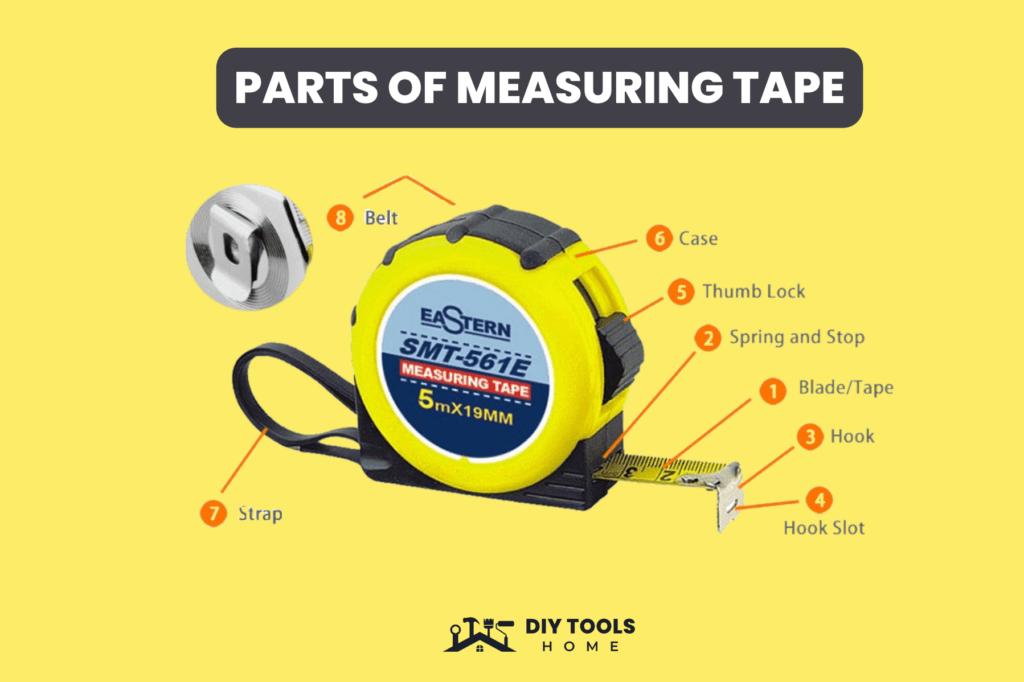
Before measuring something, it is essential to understand the parts of a tape measure. It is considered to be vital to mastering the art of measurement. This handy tool may seem simple at first glance, but it’s packed with features that can simplify your measuring tasks. Here’s how each part of a tape measure works to help you make precise measurements every time.
1. Case
A tape measure’s case serves as its protective outer shell. The housing protects the blade when not in use using durable materials like plastic or metal. A metal model is the most durable, while a plastic model is more affordable. It’s like armour for your tape measure – it protects it from drops and bumps.
2. Case Length
A tape measure’s case length is its length after the blade has been fully retracted. A longer case length can provide more leverage when measuring long distances, an essential factor to consider when choosing a tape measure. The case length is often printed on the back of tape measures.
3. Blade
Blades are flexible, long strips marked with measurements extending from the housing when a tape measure is used. A tape’s top row usually has imperial units (inches), and its bottom row typically has metric units (centimeters). It measures all of your measurements. It’s usually made of fiberglass or metal.
4. Hook
Hooks are small, curved metal pieces attached to a tape measure’s blade. The metal piece’s first inch is 1/16th of an inch; thus, you can push it taut to ensure precision. You can take Measurements by hooking it onto the object’s edge to be measured.
5. Spring and Stop
Measurements are made easy and accurate with the help of a spring and stop in a tape measure. In taking measurements, the blade is held in place by the stop while the spring drives blade extension and retraction. Combining these two features makes the tape measure a handy and durable tool.
6. End Hook
An end hook slot on a tape measure is a little notch that allows the hook to sit flush with the blade, improving accuracy in measuring inside diameters and widths. The clip is designed to attach to a nail or screw, which can be handy when working on a construction project.
7. Lock
An extremely crucial part of taking measurements is locking the blade with a lever or button. The thumb lock on your tape measure lets you stop it from automatically retracting. When you’re done using that tape measure, push it up again.
8. Belt Clip
A belt clip on the back of the tape measure housing keeps it attached, so you can easily access it while wearing it.
Ensure you understand the different parts of your tape measure the next time you reach for it.
How to use a tape measure
Even though it may seem simple, using a tape measure requires a few tricks. You can use a tape measure by following these tips:
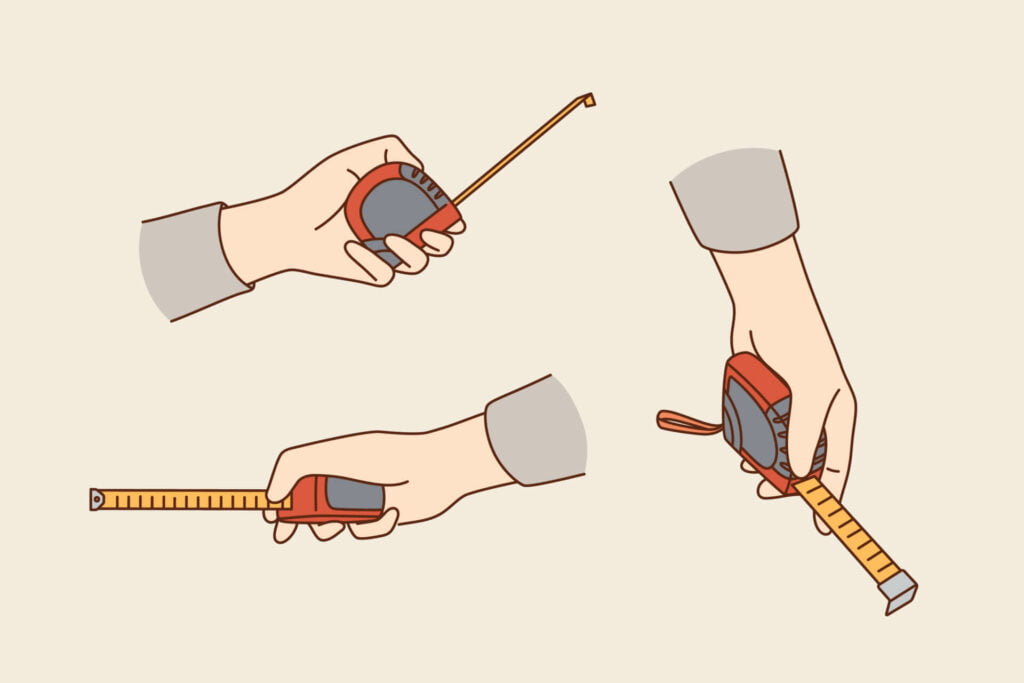
- Hold the tape measure firmly with your thumb and forefinger to avoid sagging or stretching.
- Take out the tape measure blade and ensure the end hook is on the edge of the object you’re measuring.
- As soon as you have secured the end hook, or tang, to the edge of the object, it would help if you pulled the blade out to the desired length. Make sure the blade is locked in place and lay the tape measure flat to allow both hands to be used for measuring and marking.
- It would be best to put your hands close to the desired measurement. Then, gently pull the tape measure, so its floating tang extends, providing you with the best possible accuracy.
- Keep one hand taut on the blade while using the other hand to roll the blade’s edge onto the object for a flat measurement. Mark it down with a pencil for accurate measurements every time!
- When measuring length, you should pay special attention to the markings on your tape measure. If the 3/8″ line aligns perfectly with the object’s edge, the measurement is 5.375 inches, or 5 and 3/8 inches.
- Once you have marked the measurement, release the lock button to retract the blade. Don’t make sudden jerking movements over time to avoid malfunctions.
Using a tape measure correctly takes practice and attention to detail. Hold a tape measure firmly, hook the end hook, pull the blade tight, use the lock button, check the measurement, and store it properly.
Tape measure tangs are loose for a reason
Tape measures have tangs, or hooks at the end of the blade, designed to slide back and forth slightly, enabling interior and exterior measurements to be made thanks to their tape measure. To ensure accuracy when measuring inside dimensions, press the tang of the measuring tool against the wall for a float of 1/16 inch inward. For consistent precision, add tension to the tang when measuring the outside edges.
Tape measure tips and tricks (Hidden Features)
Learn essential tips and tricks for using a tape measure correctly and efficiently. From choosing the right tape measure for your needs to understanding how to read the measurements, these tips will help you get accurate measurements every time.
- A Tang with Serrated Edges
Serrated tangs are common on tape measures. Not only is this useful for getting accurate measurements, but it’s also great for scribing. By giving a slight back-and-forth motion after pressing on the tang, you can scribble without a pencil if you don’t have one.
- Face Slot on the Tang
Tape measures come with a small hook on the face of the tang, which is used for measuring nails or screws. Measurements of large distances are made much easier with this tool.
- Marks on the Frame
Red squares are usually spaced every 16 inches, while black diamonds are spaced every 19.2 inches on tape measures. These marks determine stud spacing and floor joist spacing. It will save time and effort by locating framing members behind drywall and floors this way.
- The Inside Measurement Marking
A marking is found at the bottom of each tape measure casing, which allows you to measure inside measurements without bending the tape. Put the tang in place after sliding the blade out. The case should then be extended and butted directly to the interior edge. Taking the length of your tape plus the marking on the casing base, you can determine the internal dimensions.
- Erring on the Side of Excess
You should use the larger measurement if a measurement falls exactly halfway between two lines. If in doubt, err on the side of excess. You may need to sand or nibble at the end for the exact length with a saw.
Why is measuring important?
Measurement is essential because it enables us to understand the world in which we live. Instead of relying solely on guesswork, it allows us to quantify, comprehend, and make judgments based on data and facts.
Additionally, with precise measuring, carpenters and woodworkers would be able to produce high-quality work like wood fencing, bespoke wood cabinets, decks, etc. as a homeowner, you would be able to determine the amount of carpeting needed for one room.
Following are the detailed points on why measuring is important:
Conclusion
Using a tape measure is an important skill that can be used for a variety of tasks. It provides a quick and accurate way to measure the dimensions of an object or space. Proper usage of tape measure can help you in various projects, from simple home renovation to complex construction work. With a little practice, you will become more comfortable and accurate with using a tape measure, and it will become an essential tool in your toolbox. It’s a simple yet versatile tool that can make your life easier and more efficient.
Any activity involving carpentry, woodwork, or house repairs requires a tape measure. Now it’s time that you use your new understanding of measuring tape use into practice so that you know the ins and outs of doing so. Take out our measuring tape and begin working on your upcoming project!